After I finished my computer science degree I started this game as a personal project and also as a challenge.
The first thing I did was learning OpenGL ES 2.0 for Android and then I jumped to ES 3.0 thanks to the experience I had with regular OpenGL.
Apart from the music, the sound effects and the original 3d models and textures all the elements of the game were made by me: the programming, the work on the 3d models to adapt them and the creation of all the elements of the UI.
Rendering
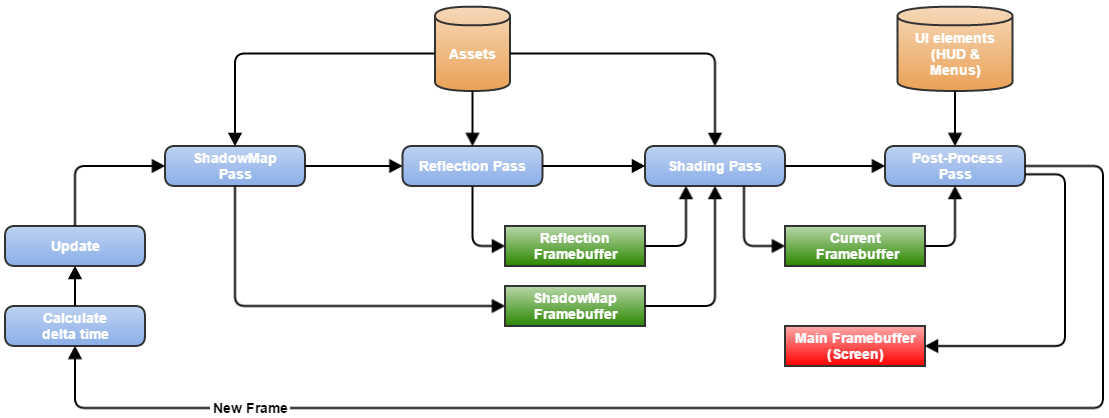
The game uses a forward renderer with the following features:
Instanced rendering for the objects in the scene (grass, trees, plants and rocks) and for the particles in the particle systems.
Different levels of detail for the objects.
Frustum culling (on cpu).
Real-time lighting.
Real-time shadows.
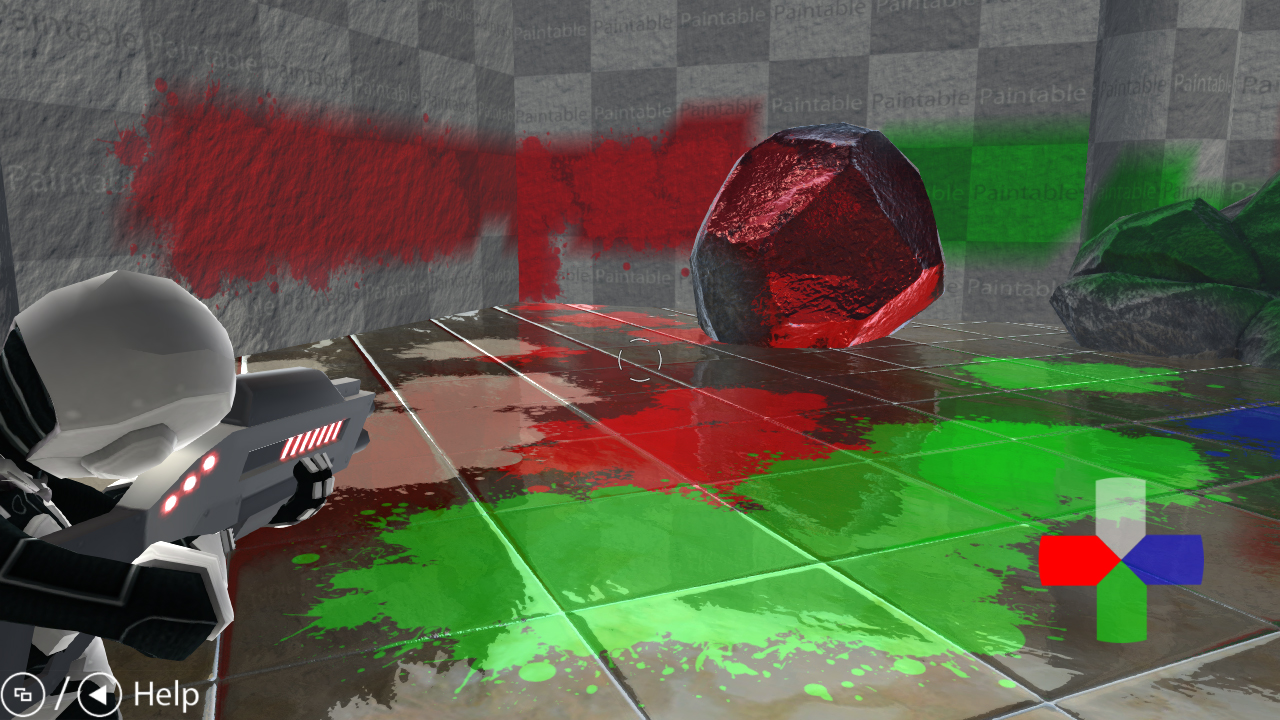
Real-time reflections.
Post-process motion blur.
Custom mesh file format and ETC2 compressed textures.
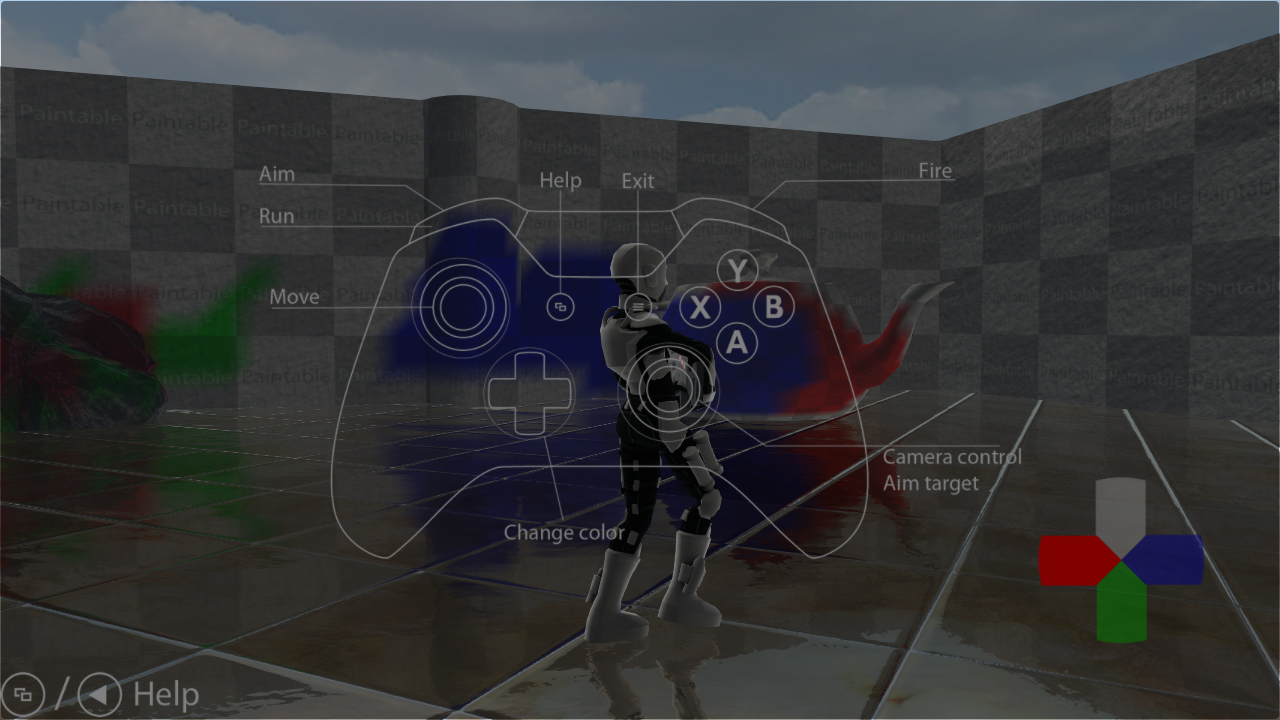
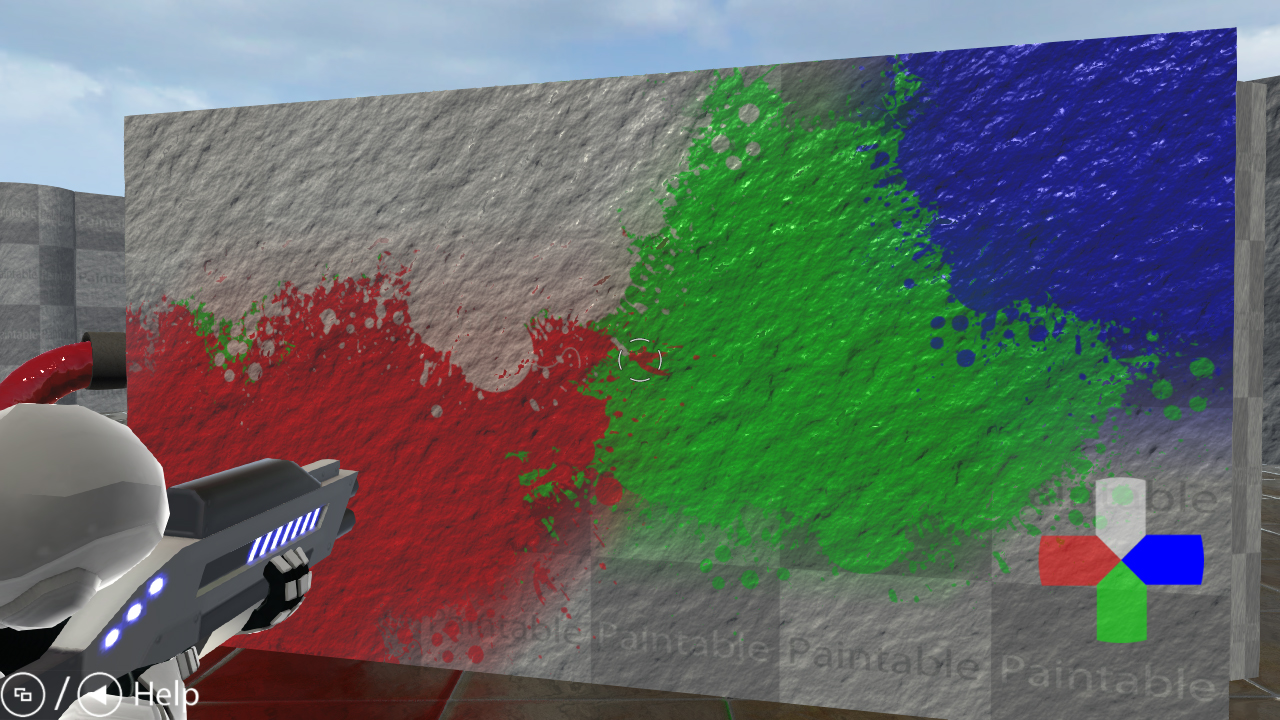
User interface with animated transitions and dynamic elements.
Renderer stages.
Scene generation
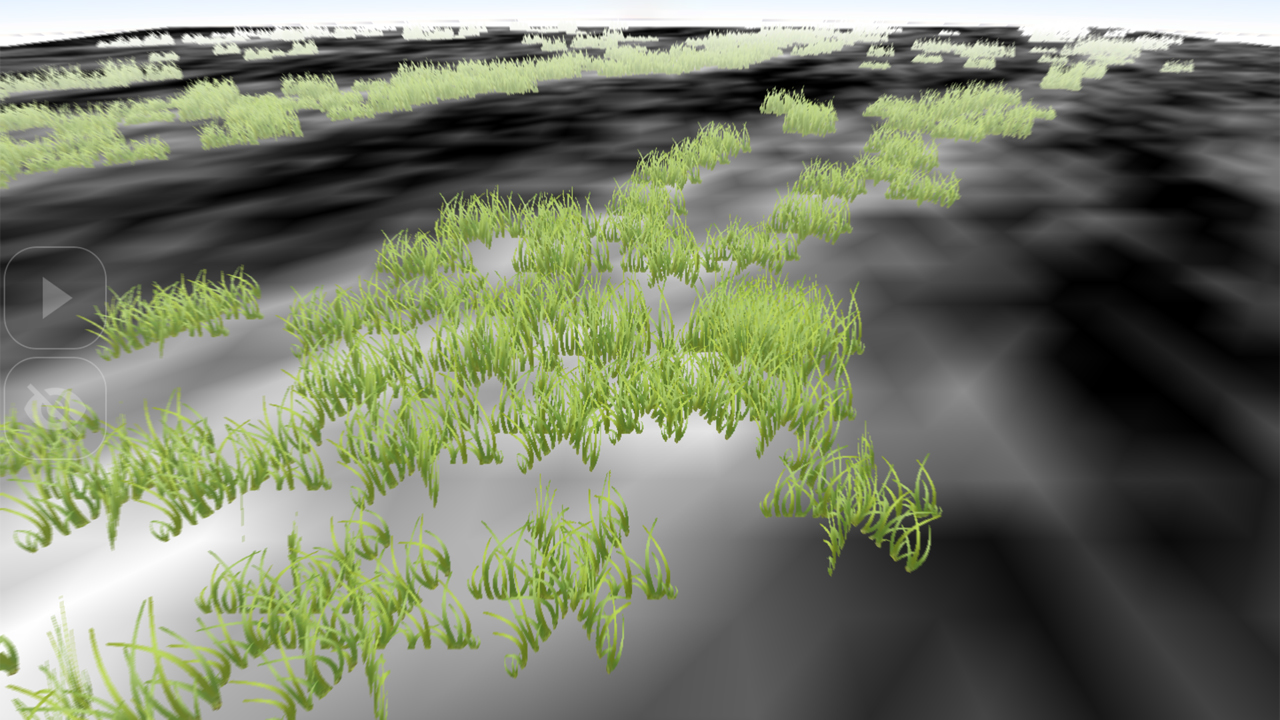
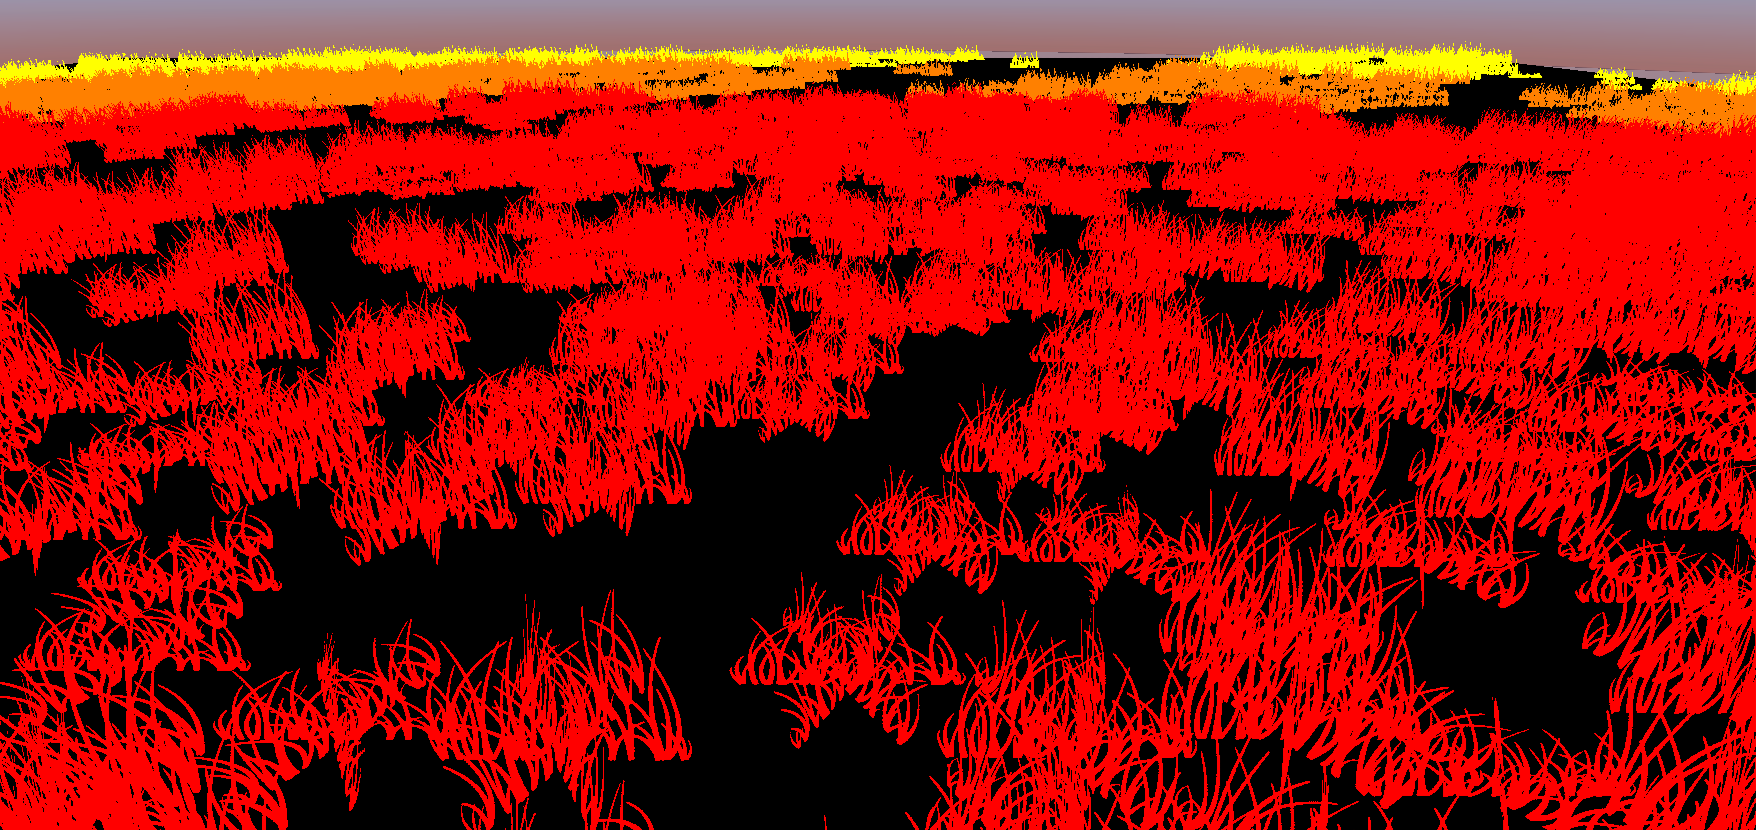
All the scenery is being generated while playing. The ground is divided into square patches and they are reused as they disappear behind the camera. These patches are meshes and its vertices have an extra attribute, color.
The grass points are filtered depending on the color of the nearby vertices and the objects points are filtered depending on the probabilty of appearance of the different objects.
(Left) Example of grass generated depending on the vertex color of the ground. (Right) Example of shaded ground with interpolated textures, reflections and normal mapping.
Levels of detail
Every frame the distance to the origin is calculated for every object in the scene (grass, trees, bushes & rocks). They are classified in different LODs depending on that distance.
Objects in a further LOD use a lower polycount mesh and a simpler version of the shader.
The 3D grass instance rendering uses 3 uniform buffers (one for each LOD). The rest of the objects have 2 levels of detail.
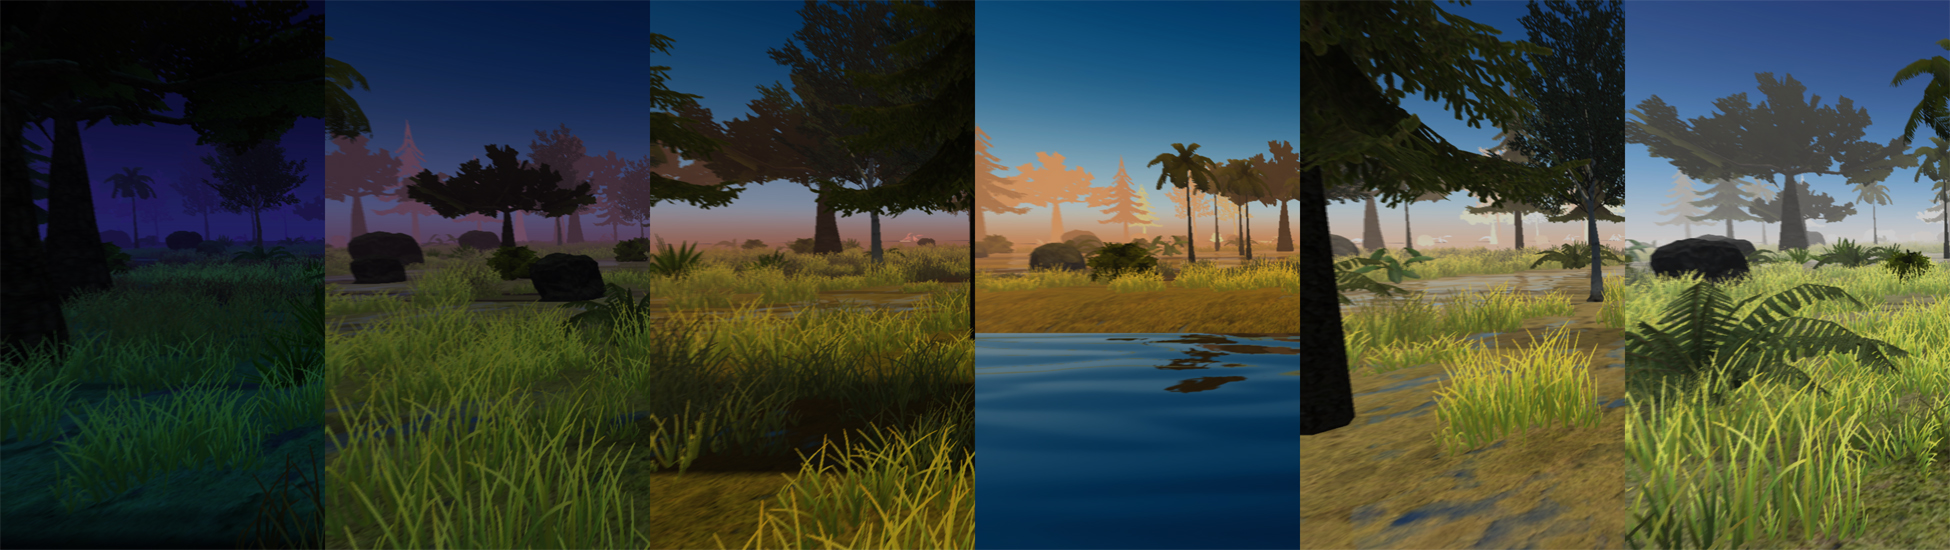
Having real-time lighting and shadowing allows to have a Night-Day cycle.
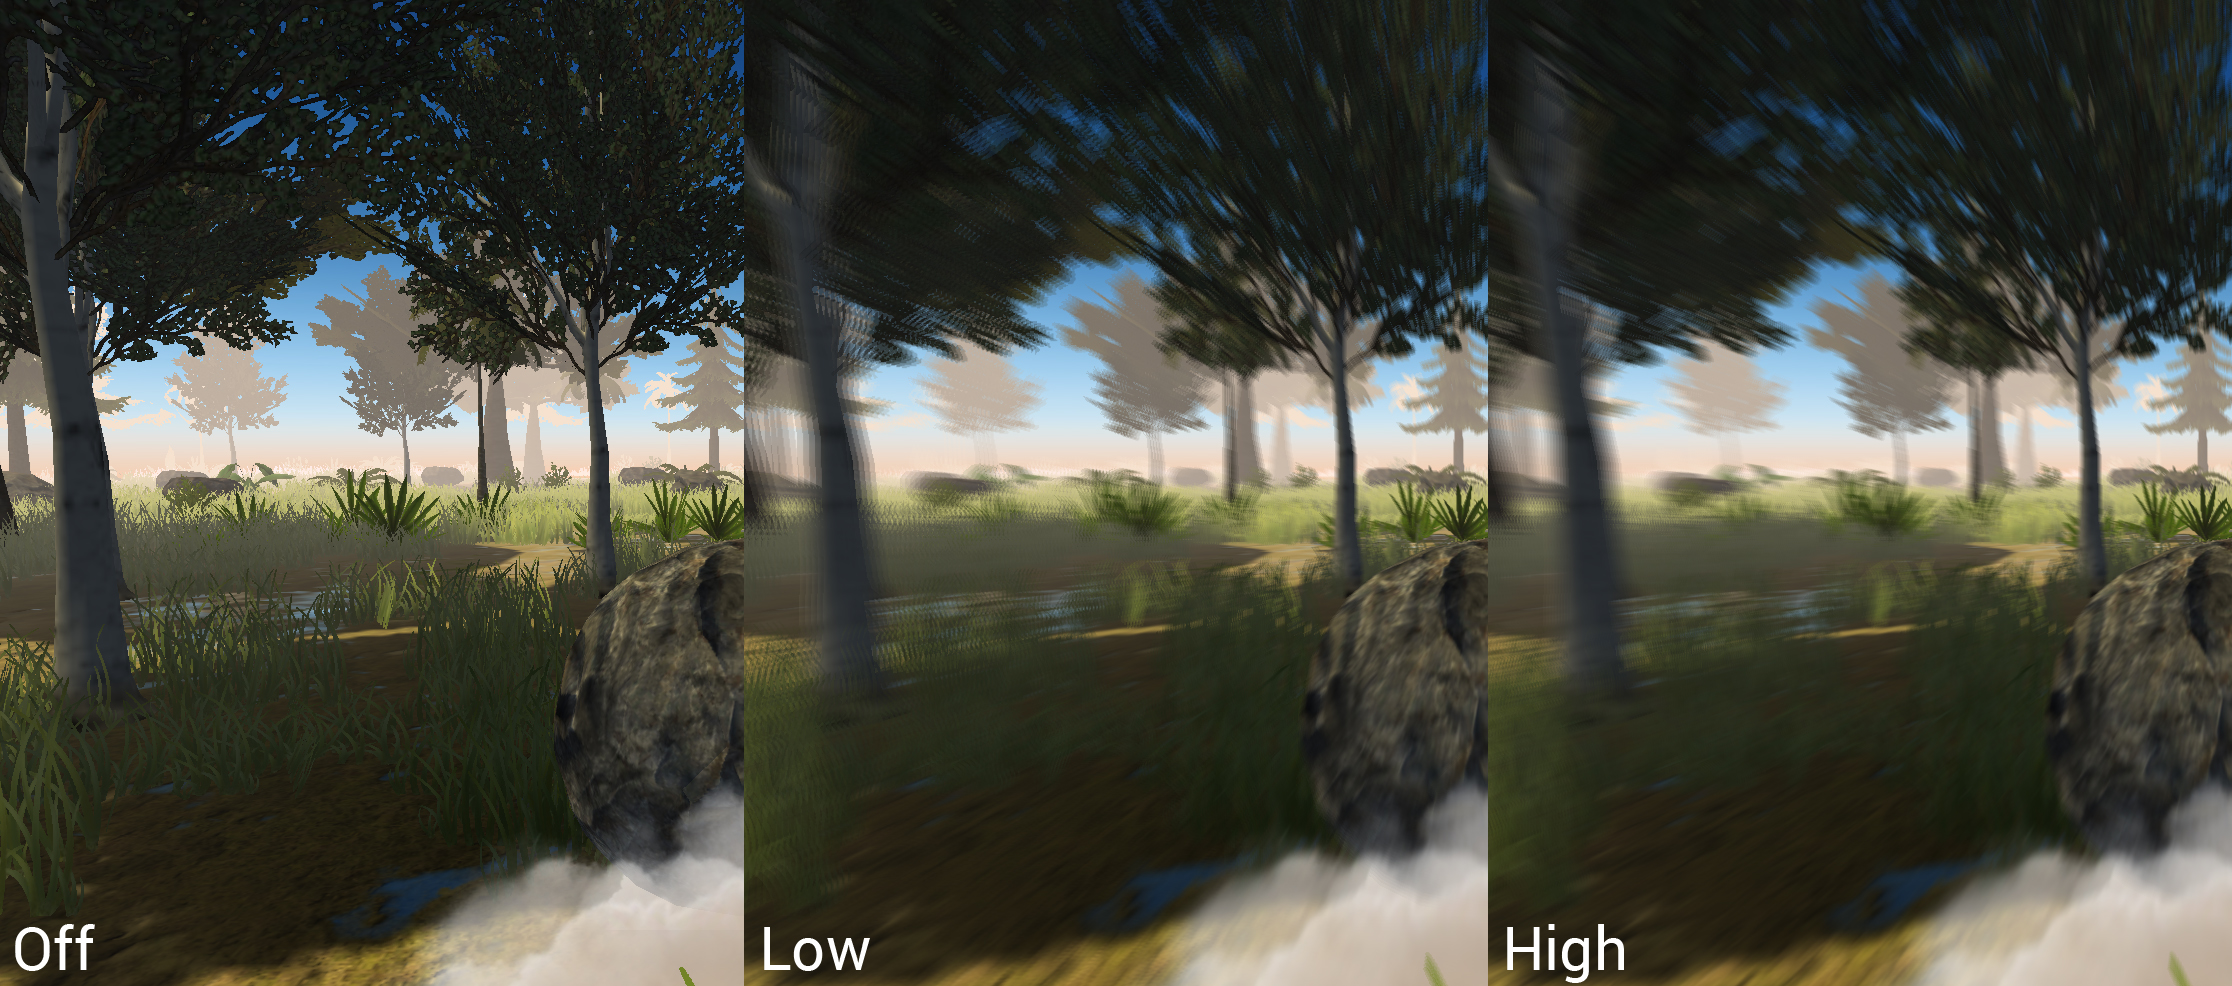
Post-Process Motion Blur
Comparison between the three possible settings for the effect.
Collisions
Each object in the scene that the player can collide to has an associated collision primitive (cylinder or sphere).To detect if the player has collided with an object I check if the player rock (sphere) intersects with another collision primtive.
3D Models
I used 3D models (and their corresponding textures) from Hughes Muller and Tomislav Spajic and modified them to make them more suitable for my needs.
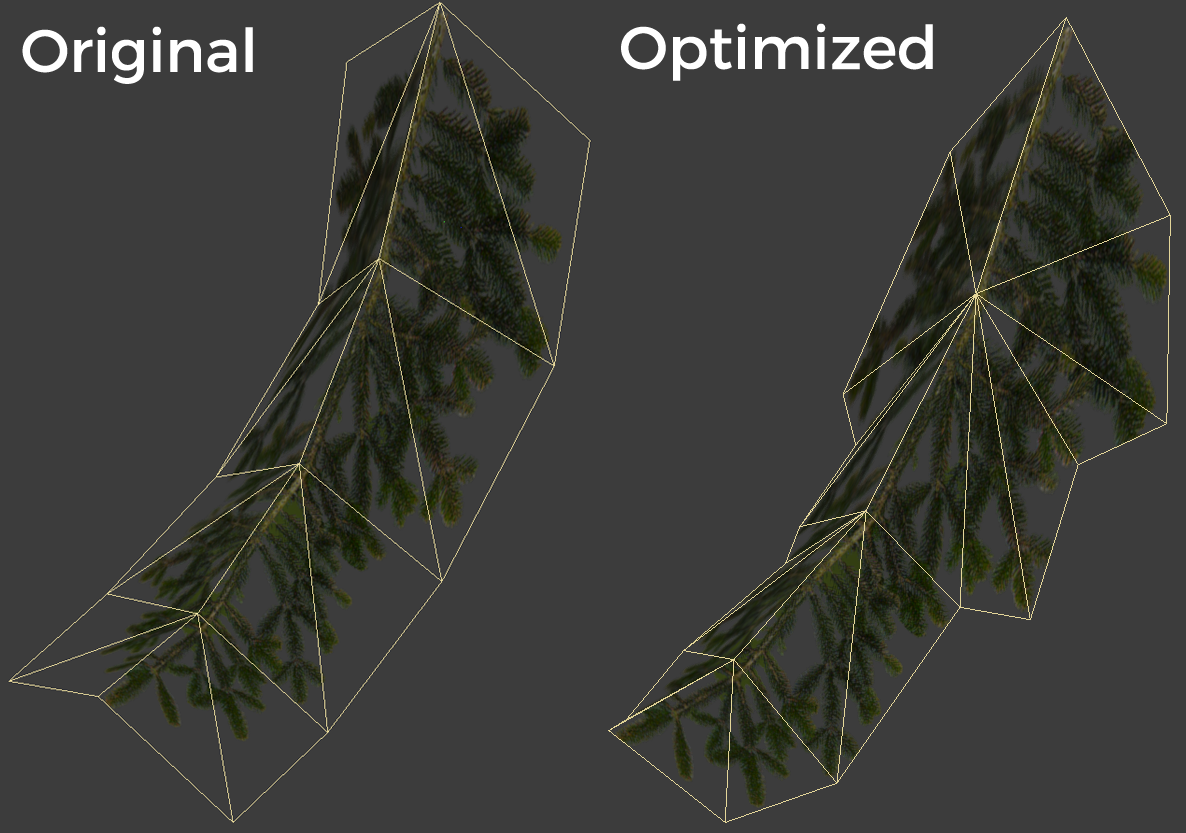
The work on the models consisted in 2 main tasks: reducing the level of detail (first to get a lower polygon count and second to obtain 2 levels of detail of that model) and optimizing the meshes.
Comparison between the original pine tree leaf geometry and the optimized one. The polycount is increased just a little bit but the shader work is reduced. At that time it resulted in a gain of almost 2 frames per second.
Other
For this project I also made a simple C++ program to convert .OBJ files into .VBM files. This custom format is used in the game to load models directly, that way no additional computation is made in the loading phase.
Gameplay Video
Project CARS
Software used:
Adobe Photoshop
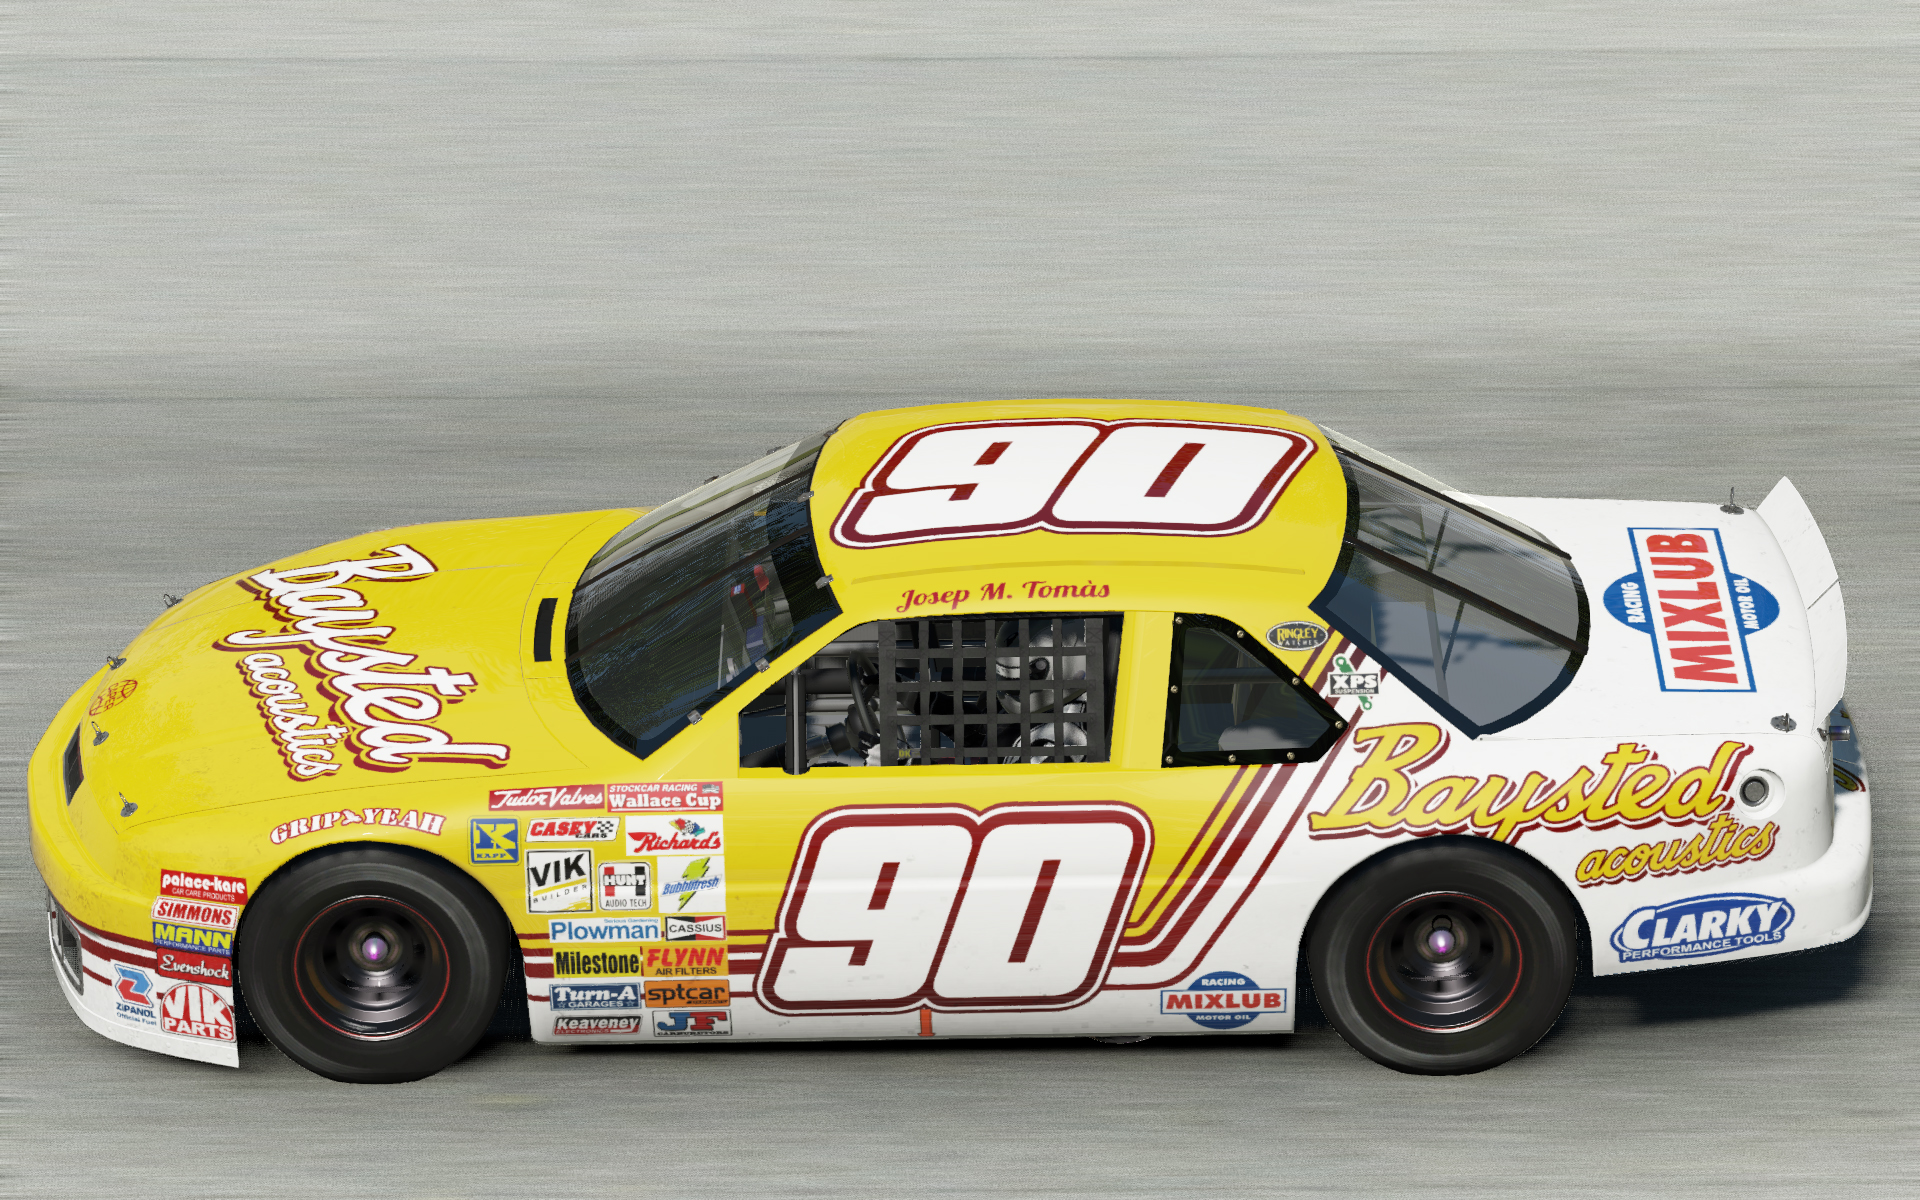
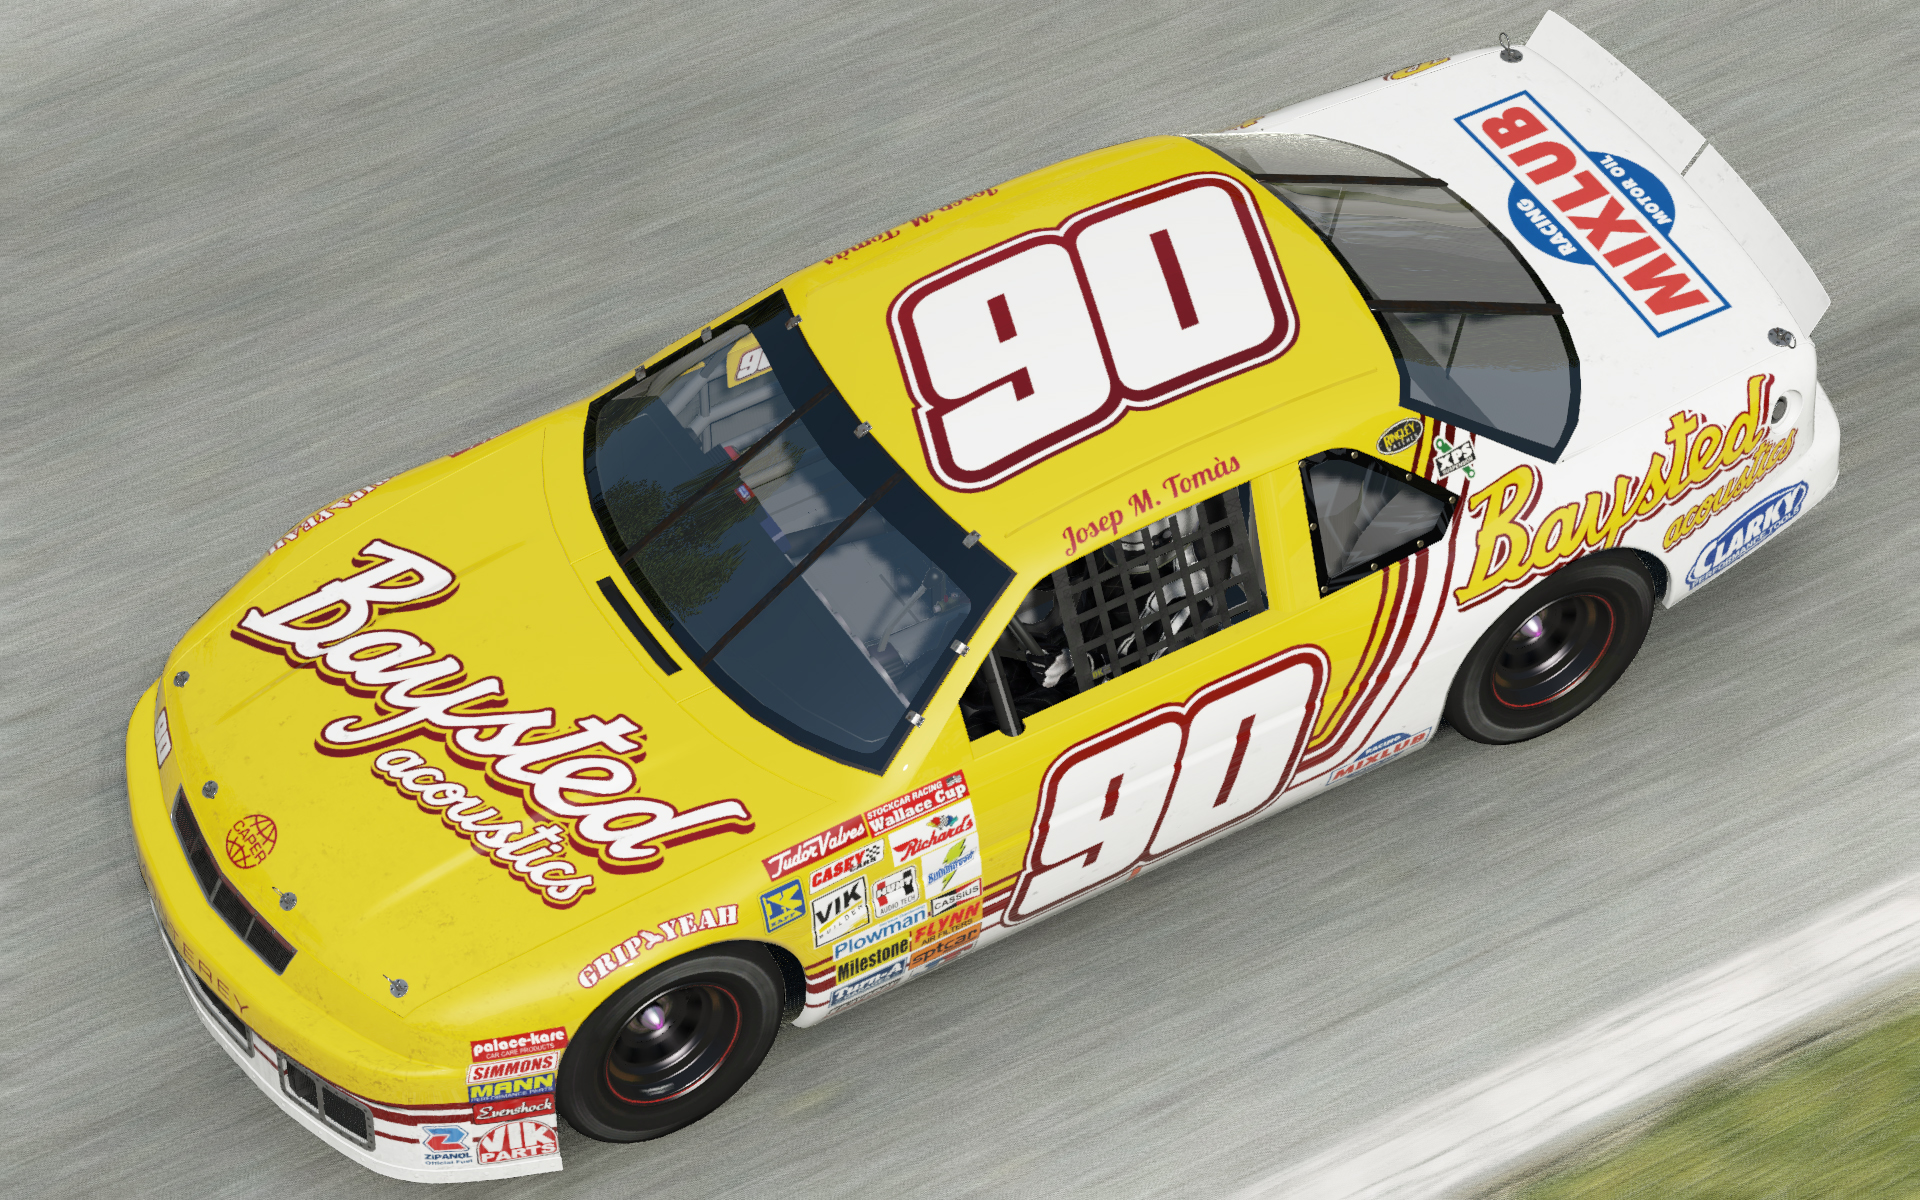
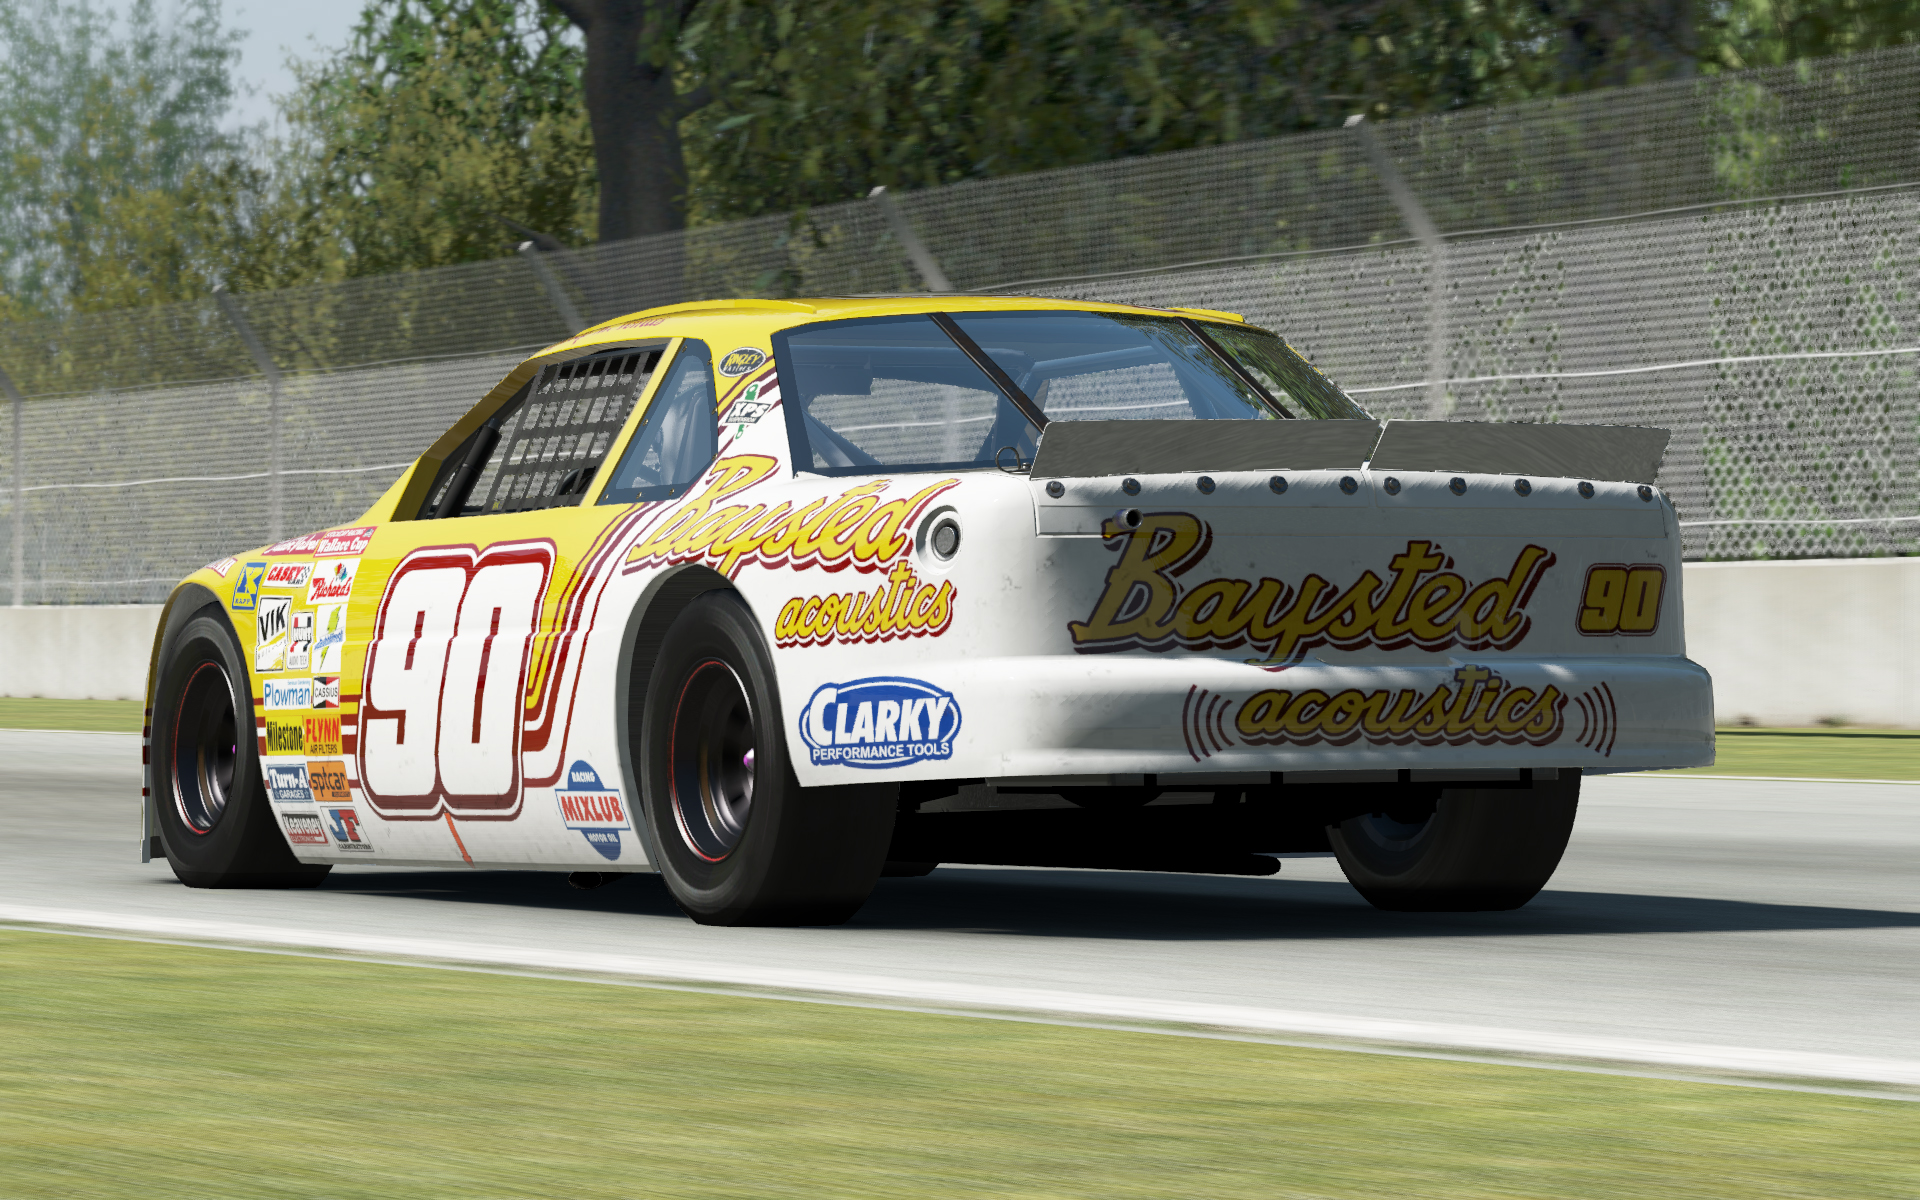
I started backing the project back in 2012. At a certain point they let the players use custom liveries for the game. This resulted in a few contests where the users submitted their liveries and the community and the Slightly Mad Studios staff chose the better ones. I made some liveries that made it into the game and as a result of that and the support I could give in the development process I was rewarded with a special honorary mention in the credits (Community Content Provider).
The work made in this liveries include the creation of paintings and custom fake logos, both of them using vector shapes.
This was the final project of my computer science degree. I started it in January and I did it while attending classes and doing other subjects’ work and projects until I finished it in July.
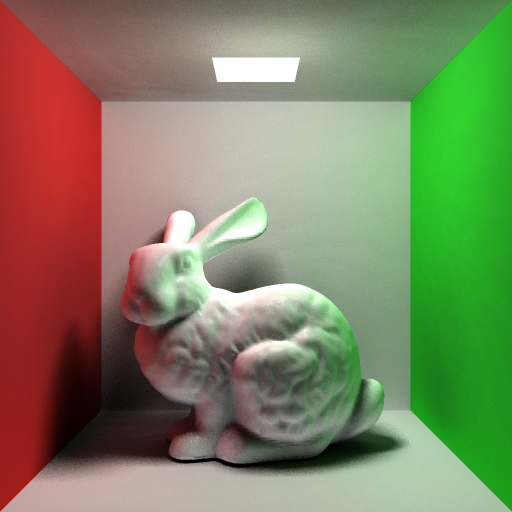
I previously made a simple CPU ray tracer for the Computer Graphics subject. It had 2 types of primitives (sphere and box), 3 types of light (point light, spot light and directional light), basic shadows, reflections, antialiasing and it used the Whitted lighting model.
Using that simple ray tracer as a base I added some new features like meshes, computing indirect lighting or using OpenMP to parallelize the ray tracing process.
In the meantime I also learned the basics of CUDA programming by myself and I liked it a lot, so much in fact that I decided to take the ray tracer I had at that point and rebuild it using CUDA.
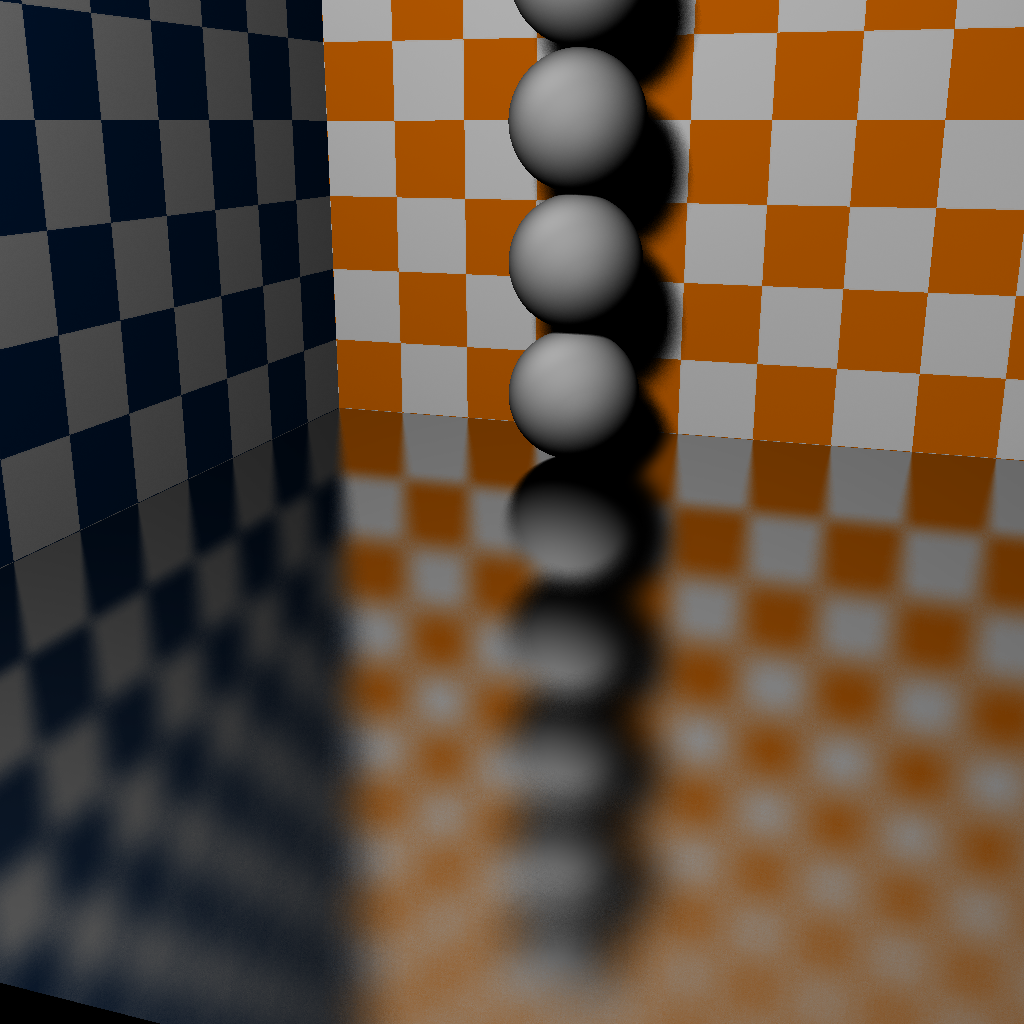
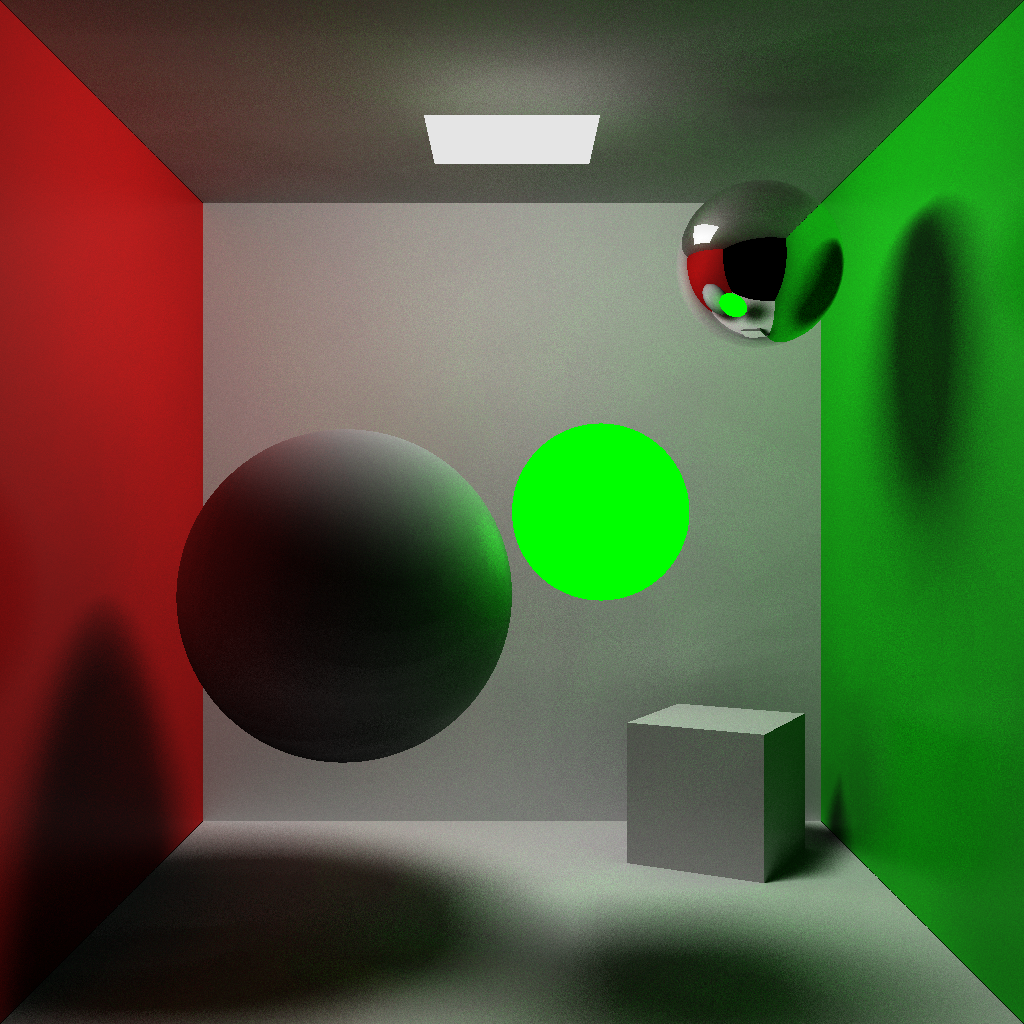
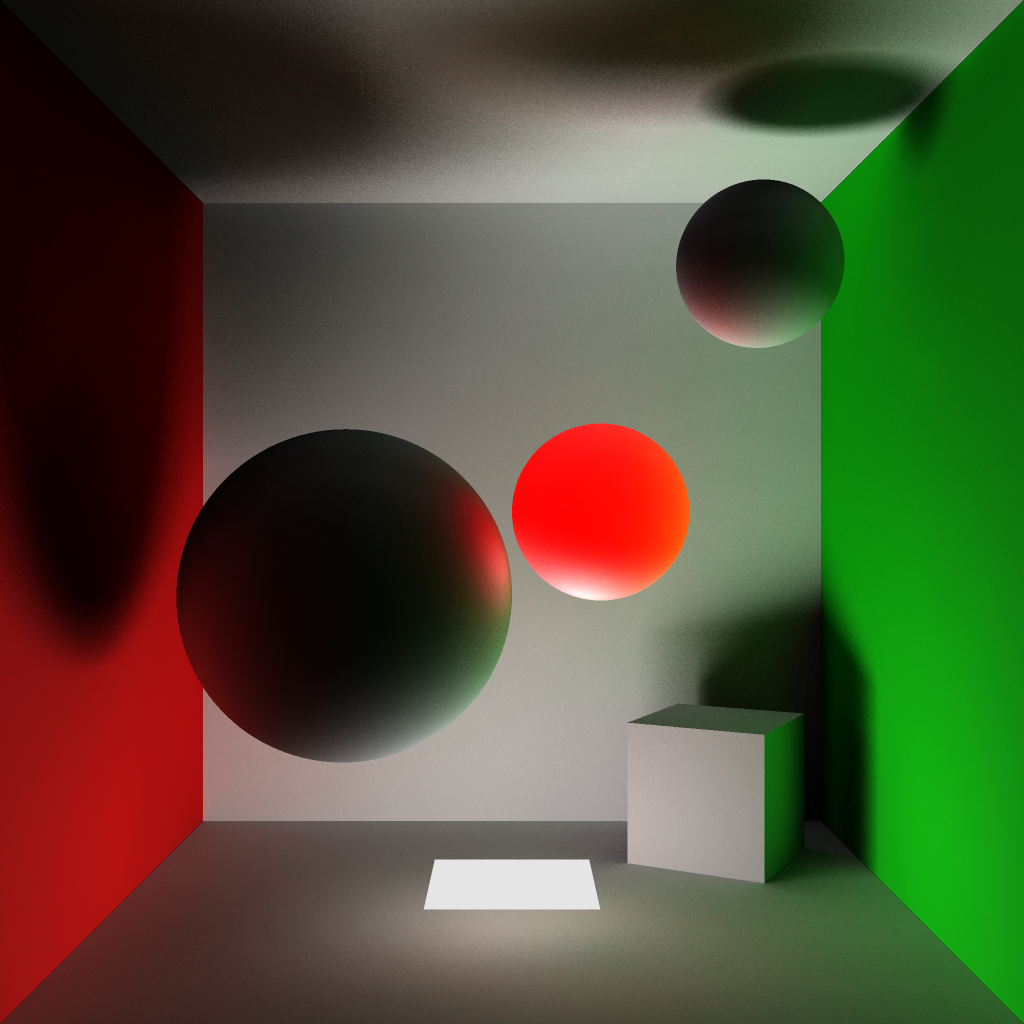
The resulting ray tracer has the following features:
Custom file format for defining the scene.
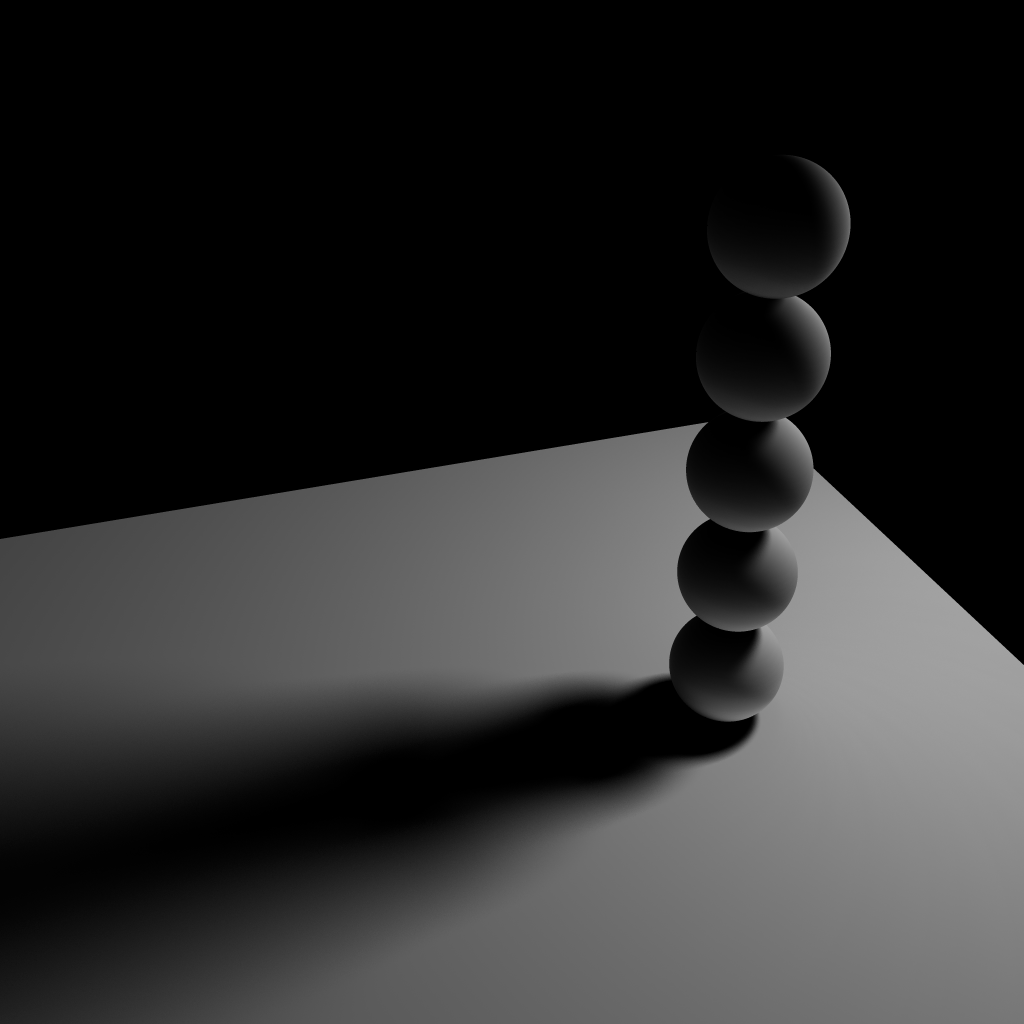
3 types of primitives (sphere, cylinder and box).
Binary CSG trees with the same 3 types of primitives (loaded from .CSG files generated with my CSGEditor).
Meshes composed of triangles (loaded from .OBJ files).
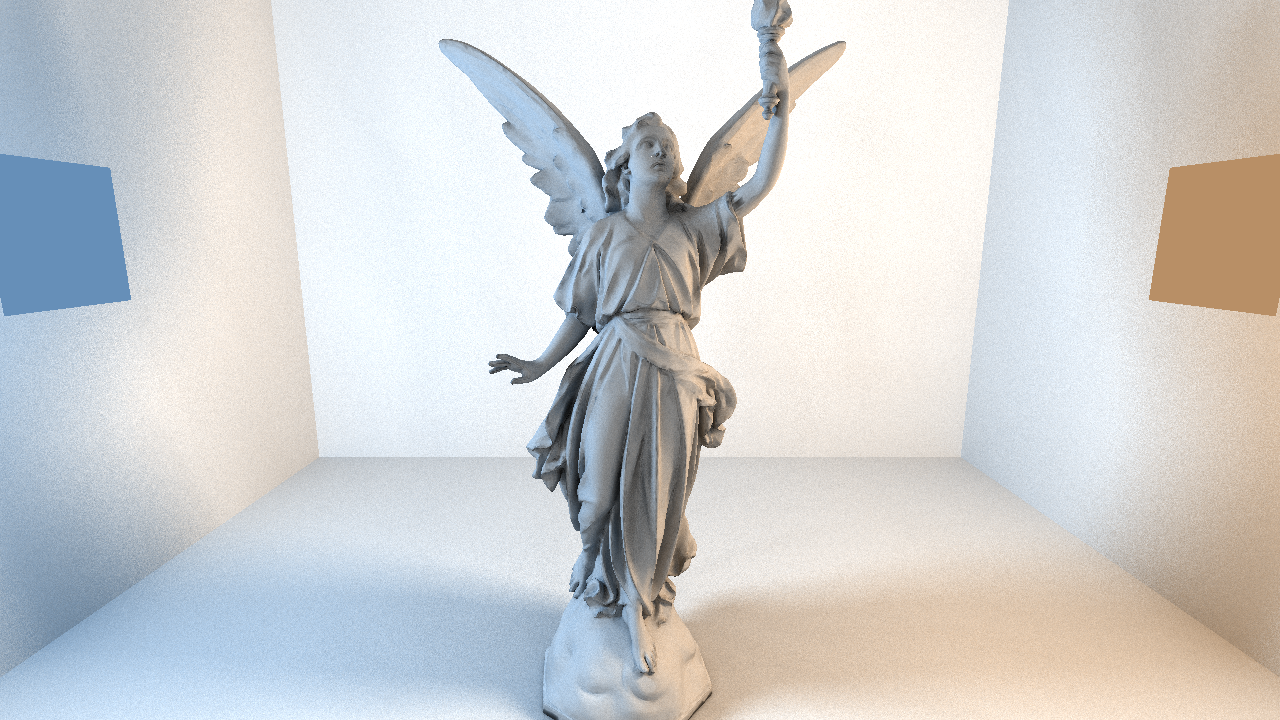
Materials.
Textures.
Direct & indirect lighting (1 bounce).
Point lights (hard shadows) and rectangular area lights (soft shadows).
This was the final project for the Computer-Aided Design subject. We had to make a project related to CAD and I chose to make a program to create and edit binary CSG trees.
I had 3 weeks to do this project while attending classes and doing other subjects’ stuff. I wanted my program to have a decent UI so learning Qt was part of that time.
The program can save and load trees in a custom file format and also can export them into another custom file format to use the resulting object in my CUDA Ray Tracer.
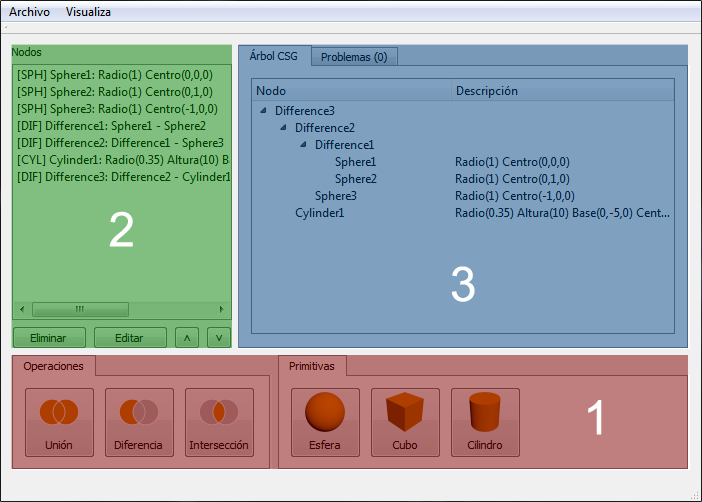
Main window
There are 3 main areas. In 1 there are buttons for create the operations and the primitives. In 2 there is the list of all the created nodes and some buttons (to delete, edit and change the order of a node in the list). In 3 it shows the current tree and the problems related to it (if any) like operation nodes without children.
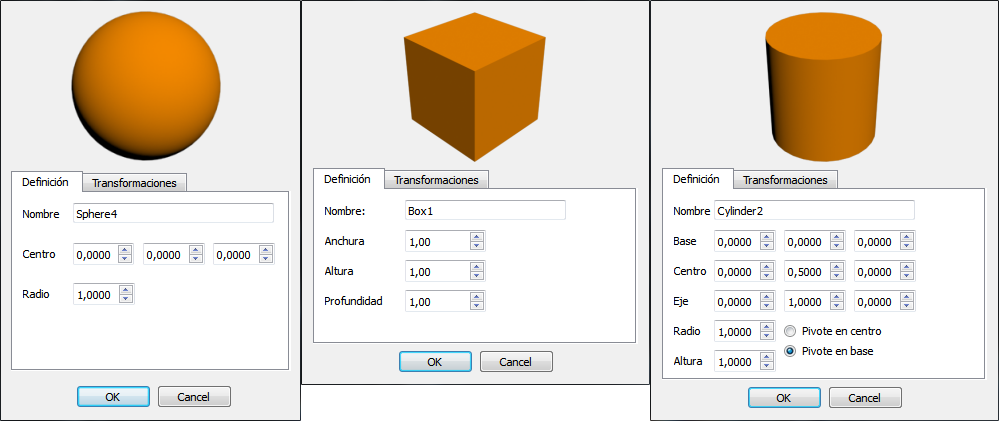
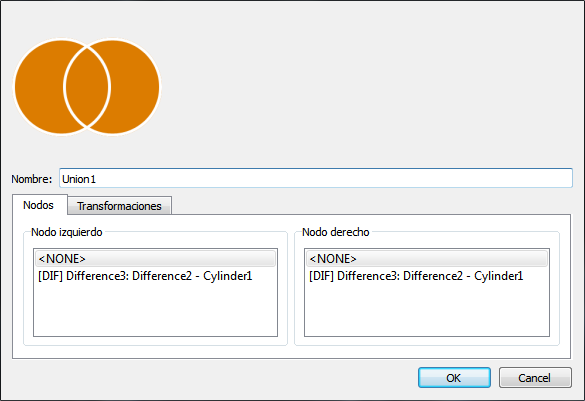
Create and edit nodes
Each primitive has its own dialog with its own properties which the user can edit. In the operation dialog the left child node and the right child node can be chosen (it shows a list of the available nodes that can be assigned to each child).
Transformations
Every node (operation node or primitive node) has a list of transformations (translations, rotations or scales).
Renderer
The program includes a renderer to view the current object. It is a basic CPU ray tracer and it was made reusing code from the CUDA ray tracer.
This was the final project of the Mobile Applications subject and it was made along with other 5 people. This Android application was intended to help professional basketball referees to fill the official stat sheets for the corresponding federation.
My role in the project was designing the UI and logos and programming a part of the application. I was responsible for the last part of the app which consisted in filling the information about the match and it included the following work:
Receiving the teams and players for the current match.
Create events for players (points scored, fouls committed, free throws made and free throws missed).
Managing a list of events, the individual stats for every player, the current minute of the match, the bonus state for both teams and checking the conditions for a game to end (going into overtime if necessary).
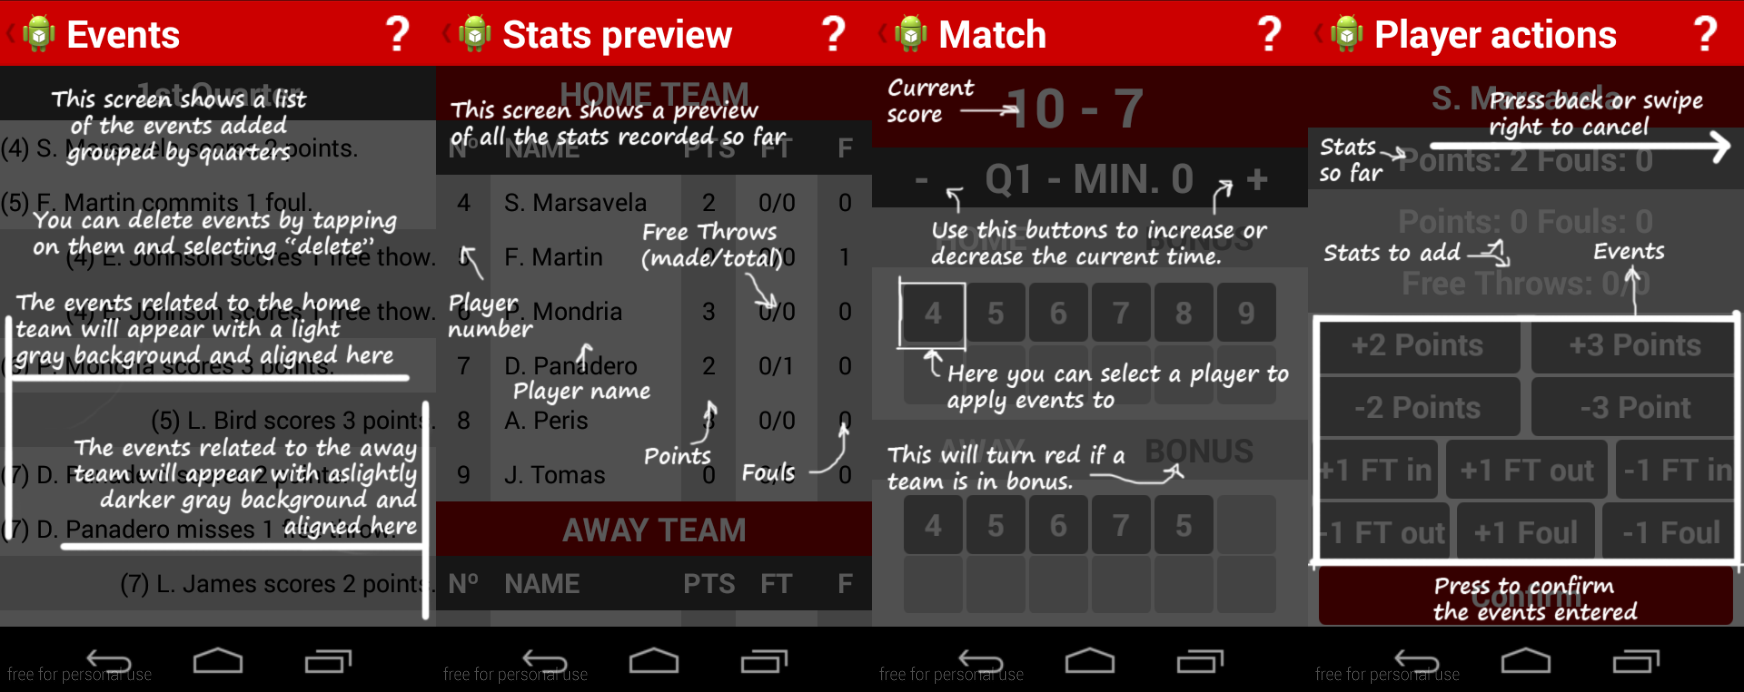
Create some help fragments using an overlay image to give the user some help.
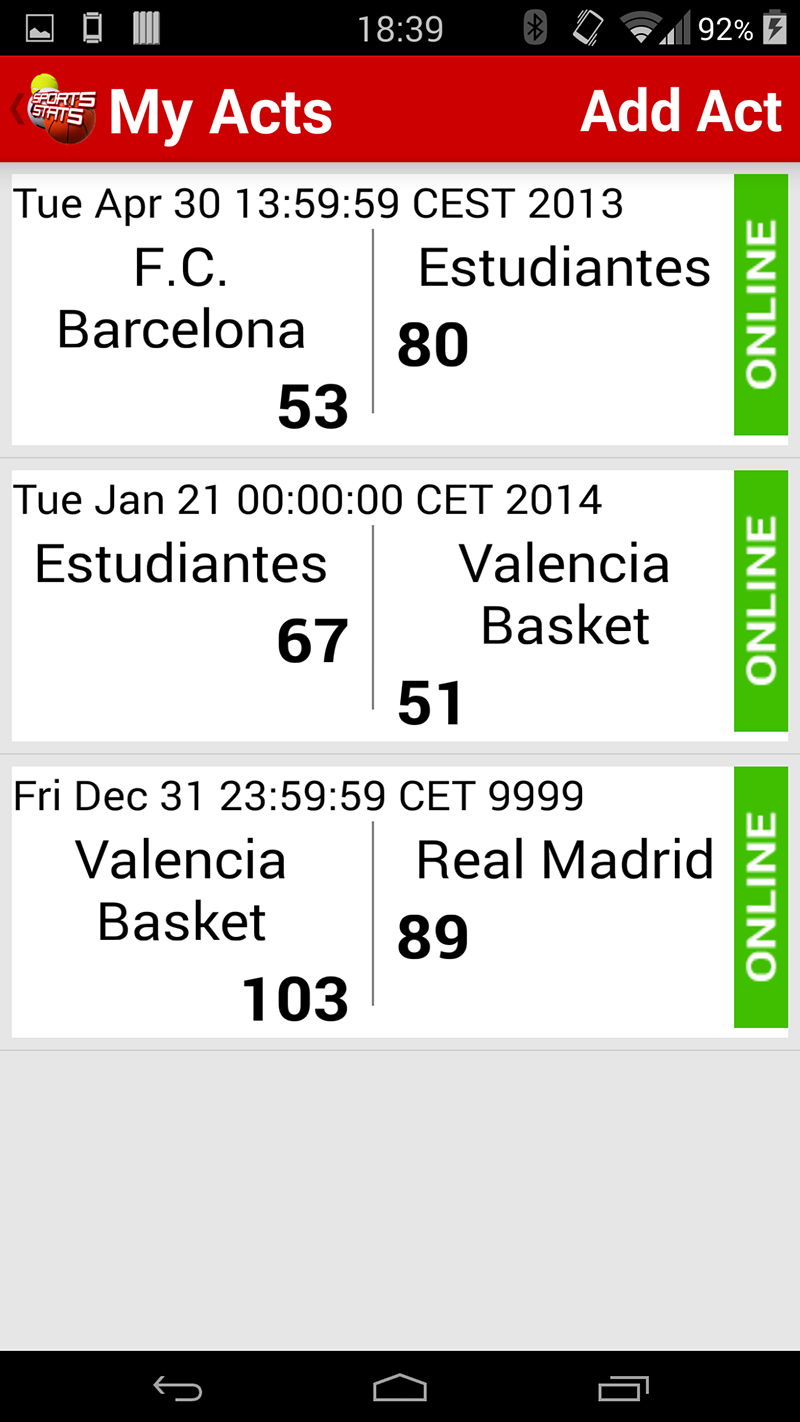
Create a list of events when a match is over for storing them in a local database.
My ViewPager and its Fragments
The same Fragments with the overlay help
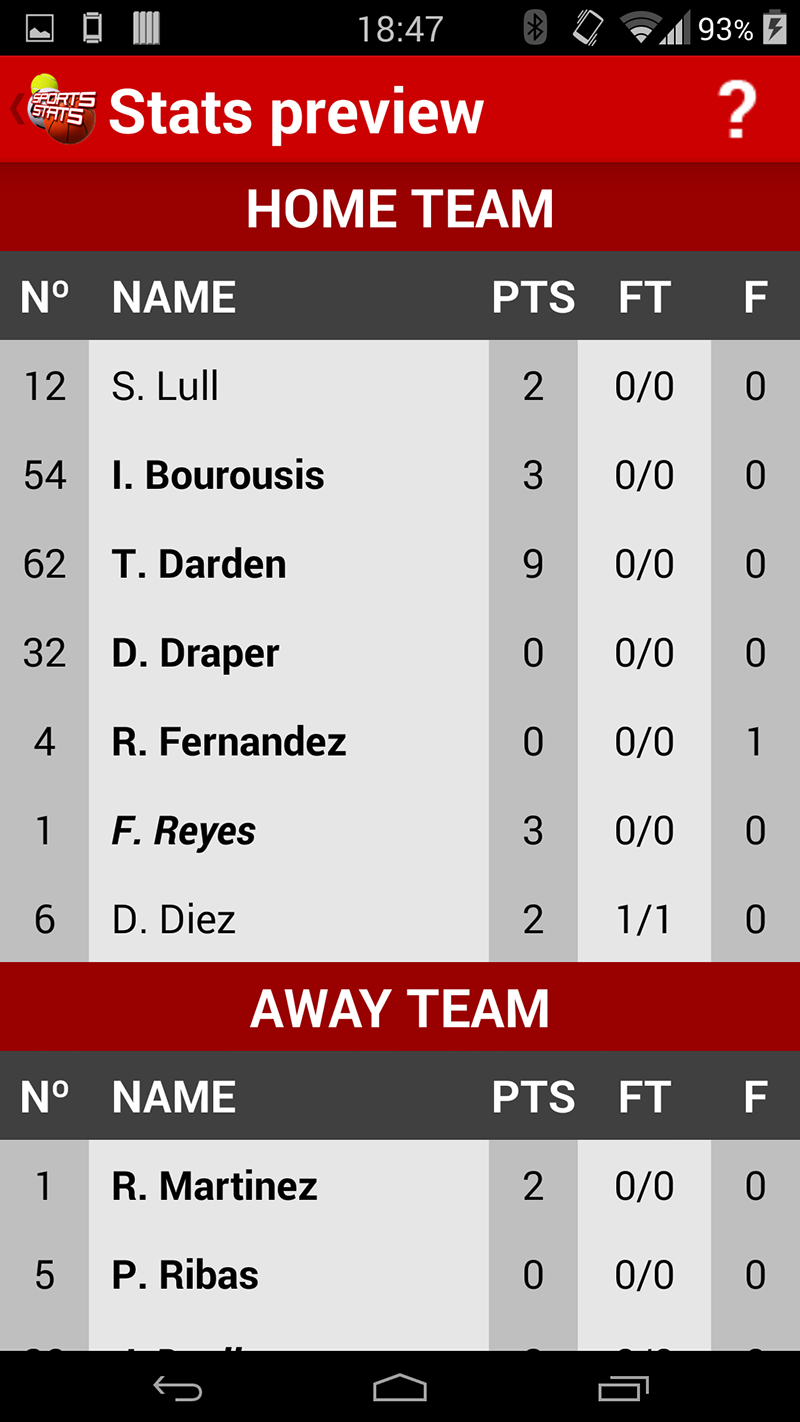
Other screenshots
Unreal Development Kit
I used Unreal Development Kit for some time and it was really helpful for me as I learned to make shaders from an artist perspective. I also learned the basics of UnrealScript.